Practical work 06: Quiz!
Intro
The goal of this work is to code our first application with a graphical interface.
This application will present to the user a quiz with 10 questions. For each question, 3 answers are possible but only one is correct. A score will be calculated for the user and we hope he can obtain the legendary score of 10!
Prerequisites
Warning
The minimum required version of Java is JDK 11
Info
To do this work, it is sc to have the following software installed on your computer:
- E(fx)clipse plugin for Eclipse, if you want class generation (more on this in the slides)
- SceneBuilder (choose your version according to the version of Java that you installed)
Install E(fx)clipse
E(fx)clipse enables JavaFX support in Eclipse.
Hint
IntelliJ IDEA supports JavaFX from the ground up in the recent versions. You won't need any plugin.
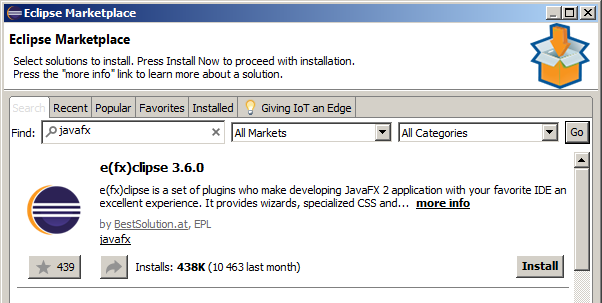
To install E(fx)clipse, follow these steps:
- First, go to
Help -> Eclipse Marketplace... - Then, in the dialog window, in the drop down menu, choose
All Marketsand search forjavafx(don't forget to click on the Go button). - Then click on the Install button on the e(fx)clipse plugin.
- e(fx)clipse will then install on your Eclipse installation
Install SceneBuilder
SceneBuilder is a graphical editor for fxml files. It eases the conception of the GUI of your application, without having to deal with raw xml.
- First download and install SceneBuilder from the Gluon site,
- then link it to your Eclipse installation in order to be able to edit
fxmlfiles in place.
Hint
Open the preferences of your IDE (In Eclipse, open Window -> Preferences, In intelliJ IDEA use Ctrl+Alt+S ) and type JavaFX in the filter field. select the JavaFX entry, and point the SceneBuilder field to your SceneBuilder Installation

Hint
Alternatively, on Windows you can use the wingetintegrated package manager: winget install scenebuilder
Installation of the project
The last step is to generate a new JavaFX project, using maven. to do that in Eclipse it's pretty simple:
- Open the New project wizard (
File->New...) and select maven project, then clickNext - In the new Dialog box, click
Next - In the third dialog box, type
org.openjfxin the filter field and select the archetypejavafx-archetype-fxmlin version0.0.6, and clickNext. - In the fourth dialog box:
- Provide the groupId:
isen, the artifactId:quiz. - Edit the
javafx-versionproperty, and set it to19. - Edit the
javafx-maven-plugin-version, and set it to0.0.8. - Then click
Finish
- Provide the groupId:
Warning
At some point, maven may ask you something to continue, just answer y in the maven console.
This will create a new JavaFX project sample, with a App.java main class, and two controllers, PrimaryController.java and SecondaryController.java.
You can go through them if you want, but you should eventually delete them along with the two corresponding fxml files (primary.fxml & secondary.fxml), as we won't use them.
Hint
For IDEA users, follow the official documentation here following the Modular with Maven part, and adapt the names according to the indications of this practical work.
- Once your JavaFX project is created, download the starting project
code.zipand to extract it inside your project's location, overwriting any existing file.
Hint
You can use the Show In -> System Explorer context menu in Eclipse, or Alt+Shift+W shortcut to quickly locate your project folder in the file explorer.
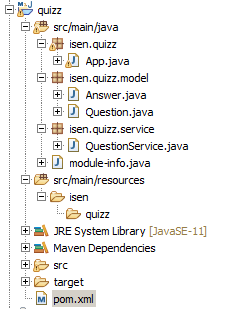
You should now have something like that:
Hint
In Eclipse, if the files don't show up once the zip file has been unzipped, make sure to refresh your project using either F5 or the Refresh item in the context menu
Test run
Maven has provisioned a specific JavaFX plugin for us, called javafx-maven-plugin (you can see it in the pom.xml file).
This is what we will use to launch our application.
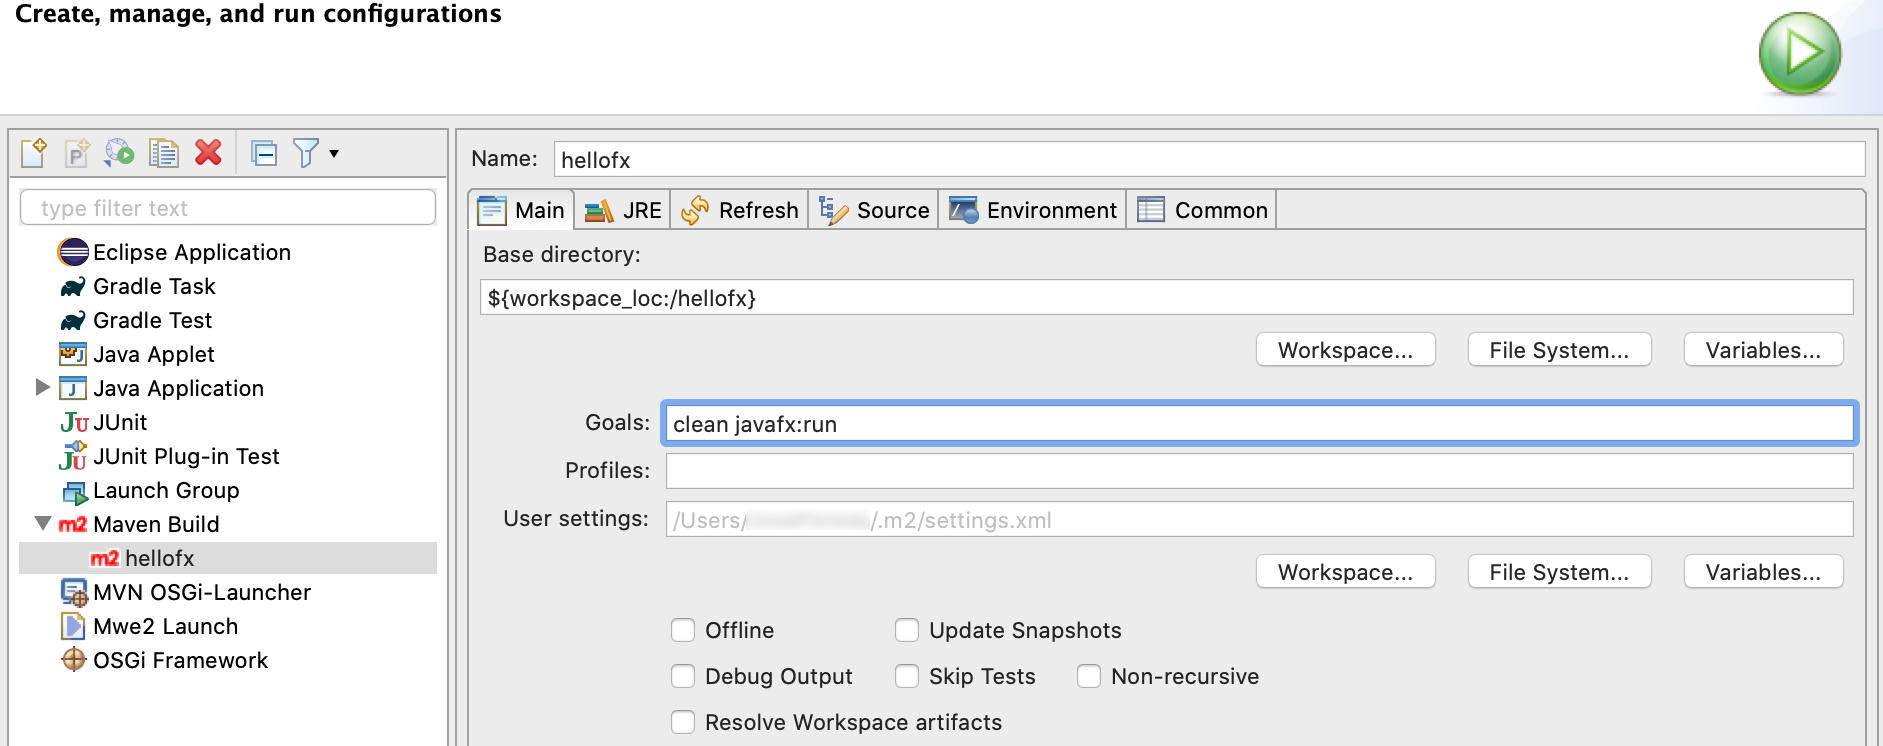
Hint
To do that in eclipse, click Run -> Run As -> Maven Build -> New launch configuration to create a new configuration. Name it Quiz, and edit the required goals, adding clean javafx:run
Warning
From now on, you must use this Maven Run configuration, and not the Java Application one. You can summon it with Alt+Shift+X , M
Danger
In Eclipse, don't forget this last step. Maven integration is especially picky with JavaFX projects, and you will end up scratching your head à lot if you don't use Maven to launch your app !! (i.e. it will not work !)
Hint
You may encounter the following error:
1 | |
mainClass in the javafx-maven-plugin plugin configuration part of your maven pom file, like this:
1 | |
Instructions
What is there?
For now, the project has 4 classes: Question, Answer and QuestionService.
The first two are the representation as object of the questions and their 3 answers that you will use in the application.
QuestionService is a singleton class that allows you to get 10 wonderful questions.
Notice the module-info.java file.
It contains the declaration of what our application will expose to the JavaFX libraries:
1 2 3 4 5 6 7 8 9 | |
Warning
this means that all your fxml views MUST be in the isen.quiz.view package!
Building the home View
You will start by building the home screen of our application.
- Create a new
FXMLfile calledHomeScreen.fxmlin a newisen.quiz.viewpackage, in thesrc/main/resources/part of your project.
Hint
In Eclipse, use the new... wizard, select fxml file as the type and Select an AnchorPane as its root.
- Open the file in SceneBuilder from your IDE to design this view. You will want to add a text for the title of your quiz and a "Launch!" button.
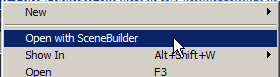
Hint
to edit a fxml file from SceneBuilder, use the Open in SceneBuilder entry from the context menu
Hint
If you can't see anything in SceneBuilder, select the AnchorPane in the hierarchy then set its prefWidth and prefHeight to 600px and 350px for example.
Go back to the App.java class. We will now make your fxml file appear !
- (optional) change the
fxmlloaded in the main method to target your freshly createdHomeScreen.fxmlfile - add a title to your main stage, by using the
setTitle()method
Now you can run your application and your view should be displayed.
Now, the quiz view
- In the
isen.quiz.viewpackage, create anotherFXMLfile calledQuizOverview.fxmlwithAnchorPaneas a root. - Edit it with SceneBuilder then add a text to print the question and 3 buttons, one for each answer.
The quiz view will appear when clicking on the launch button of the home screen.
- Create a
controllerfor the home screen calledHomeScreenControllerin theisen.quiz.viewpackage. -
Create a method
handleLaunchButton()that change the root of the application toQuizOverview(you should call the App class for that. You may want to change some visibilities on the App methods ;)). -
With SceneBuilder, link the
HomeScreenview to its controller and the button's action to the method you just created. Then, start your application and click the button, it should print your quiz view.
Question and answers
- Create a
Controllerclass for the quiz view calledQuizOverviewController. This class must have the following attributes:
| Type | Name | Visible from the view? |
|---|---|---|
Text |
questionText | Yes |
Button |
answerButton1 | Yes |
Button |
answerButton2 | Yes |
Button |
answerButton3 | Yes |
List<Question> |
questions | No |
int |
currentQuestionIndex | No |
-
Reopen
QuizOverview.fxmlwith SceneBuilder from your IDE, and link the view to the controller and the question text and the three buttons labels to their attributes, using thefx:iddrop-down menu in thecodepane of each element. -
Then create a
showCurrentQuestion()method that will get the correct question according to thecurrentQuestionIndexand print the question and the answers on the view. (You must use thesetText()method of theTextandButtonattributes) -
Create the initialize() method in the controller (don't forget
@FXML).
In this method, you must do the following:
Get the questions from the
QuestionServiceand store them in thequestionsattribute;Initialize the
currentQuestionIndexto 0;Call the
showCurrentQuestion()method.
Restart your application, the first question should appear!
Going to the next level!
How to go to the next question? Quite simple actually... You just have to increment the currentQuestionIndex and refresh the view thanks to showCurrentQuestion method.
- Implements this logic inside
gotoNextQuestion()method.
But you should wonder "What if the currentQuestionIndex is higher than questions size?".
Here is a wonderful gift: the method to call when there is no question anymore!
1 2 3 4 5 6 7 | |
You guess now that you have to handle the click of each of answer button. Because we are lazy developers (indeed, laziness is a skill for good developers), but first and foremost to avoid code duplication, we will try to group the main code into one single method :
- Still in
QuizOverviewController, create a private method namedhandleAnswer(int answerIndex). Its implementation follows this rule:
Tests if the answerIndex corresponds to the good answer of the current question.
- If it is the case, increment the score (create an empty method
incrementScore(), we will come back to this method later...).After this test, redirect the user to the next question.
- Now you have this method, you are able to implement
handleAnswerButton1(),handleAnswerButton2()andhandleAnswerButton3(). Create these 3 methods and link them to the view thanks to SceneBuilder.
Start your app and let the game begin!
How well did I do?
A game is not a good one if you don't have any score, right? We will now set the score logic.
Very easy! You can do this in only three steps:
-
Set a integer
scoreattribute in your controller -
Implement
incrementScore()correctly -
Print the score in the
Alertdialog inside thegameOver()method.
Start your app and try to get 10 points!
It could be better with a real time score! Each time you click and answer button, your score is printed in the bottom right corner of your application.
-
First of all, create a
scoreTextattribute inside your controller and link it to aTextin your view. -
Create a
printScore()method that set the score value inside the text ofscoreText. -
Each time you call
incrementScore(), callprintScore()also.
That's it! Your application is finished!
To infinity and beyond!
Going further, for each question, the number of the question should be printed on the screen. The goal is something like this:
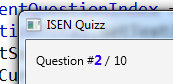
- Because
JavaFXhas no secret for you anymore, try to implement this feature. TheTextFlowcomponent will help you in this quest ;)