Practical work 07: Quiz, even better!
Intro
The goal of this work is to add some terrific functionalities to our quiz application!
At the end of this practical, you will be able to administrate the list of questions. You will be able to add, update or delete some questions.
Prerequisites
Like last week, to do this work, it is necessary to have the following software installed on your computer:
Warning
The minimum required version of Java is JDK 17
Info
To do this work, it is mandatory to have the following software installed on your computer:
- E(fx)clipse plugin for Eclipse, if you want class generation (more on this in the slides of the las practical work)
- SceneBuilder (again, choose your version according to the version of Java that you installed)
Installation of the project
- The first step is to download the starting project
code.zip, to extract it and to import it inside your workspace.
There is no need to update your Maven repository because everything should be up-to-date since last time.
Instructions
What is there? Provided API
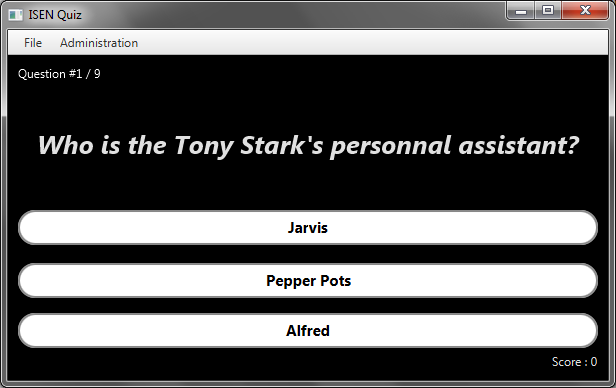
We started with the final version of the previous practical work. We brought some enhancements in order to provide you a useful code base. If you launch the application you will notice a few things:
-
The window has a menu bar with 2 categories and 3 options. At this point, only the Close menu is wired to an actual action.
-
At the end of the quiz, the application restarts and the home screen is displayed once again.
If you take a look at the code base, a lot of work is already done.
There is no need to explain in details the controllers and the fxml templates because you are smart enough to understand what is done.
If you have any question, take a look at the subject of the previous practical.
In the isen.quiz.service package, there is one service that will help you today.
QuestionService
QuestionService is the service that holds all the logic around the list of questions of the application.
-
QuestionService.getQuestions()will return anObservableListof all the questions. -
QuestionService.addQuestion(...)will add aQuestionobject to the list.
Modifications to App.java
The App.java main class had quite a few modifications :
- The principles of our new application will rely on a main scene, holding the menu, where we will switch nodes in the center of the scene.
These different nodes will be referred as views, and will be changed by the
showView(...)method. - For that, we need some generics to infer the type of the node we are loading, hence the new generic method allowing us to load a given view.
To help you with path resolution, I added everything inside this method, so you only have to pass the name of the view as an argument, and make sure that every view stays in the right package (
/isen/quiz/view) - finally, as we won't switch roots anymore, you should not use the
App.setRoot()method anymore !
Wiring the menu of the main window
The main window has 3 submenu items as we saw earlier: "Home", "Close" and "Edit questions".
Its template is MainLayout.fxml and its controller is MainLayoutController.java.
- By reading the code of the controller and the content of the template and using the services detailed right above, write the necessary methods to add an action to the "Home" and the "Edit questions" menu.
Hint
Small tip: only few lines of code are sufficient ;)
Launch your application. You should now be able to navigate between the different screens of the application.
The big part: question administration
Here is a schema of what you'll realize during this practical
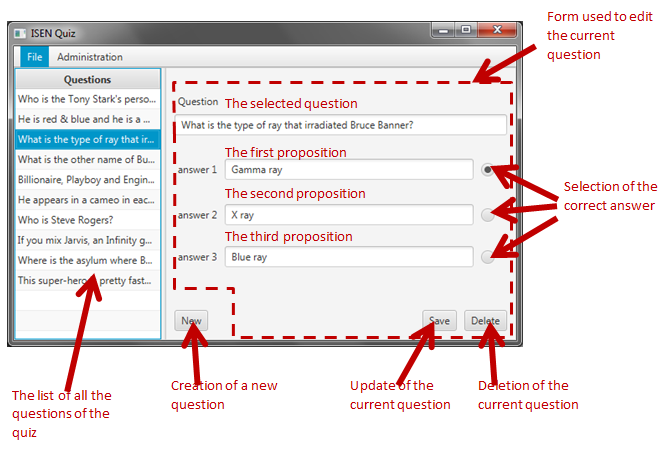
All you have to do is to implement the controller!
Step 1: the attributes of the controller
-
Take a look at these
fx:idin theQuestionAdmin.fxmland create the corresponding attributes in the controller (Don't forget the@FXMLannotation!): -
questionsTable questionColumnformPanequestionFieldanswer1Fieldanswer2Fieldanswer3Fieldradio1radio2radio3
Hint
The type of questionTable is TableView<Question> and the type of questionColumn is TableColumn<Question,String>
- In order to handle the question that is displayed in the
formPane, you'll have to create a last attributecurrentQuestionof typeQuestion.
Step 2: The methods of the list
-
Create a first method named
refreshList()that takes no parameter and have the following behavior: it refreshes thequestionsTable(take a look at its available methods) and clears itsselectionModel. -
Create another method named
populateList()that set the items ofquestionsTable(QuestionServicewill be helpful) then refreshes thequestionsTable.
Step 3: Initialization of the view
-
Create the
initialize()method and add to this method the correct annotation, which has the following behavior: -
It calls the
setCellValueFactory()method ofquestionColumn. The parameter of this method is a new instance ofQuestionValueFactory. (If you are curious and look what this class does, it will print the text of the question in the column) -
It populates the list
Let's try this by launching the application and going to the administration view. The list of questions should now have 10 rows filled with wonderful questions.
Step 4:let's play with the form
-
showQuestionDetails()is the next method to implement. It takes aQuestionobject as a parameter, and implements the following behavior: -
If the parameter is
null, it hides theformPaneby calling itssetVisible()method. -
If the parameter is not
null:a. It show the
formPaneby calling itssetVisible()methodb. It sets
currentQuestionwith the object passed as parameter.c. It calls the setText method of
questionField,answer1Field,answer2Fieldandanswer3Fieldin order to fill these fields with the attributes ofcurrentQuestion.d. It calls
setSelected()method on the 3 radios with the value returned by theisGoodAnswer()method of each answer ofcurrentQuestion -
You have now all the methods to implement
resetView()which callsshowQuestionDetails()with anullvalue then refreshes the list.
Step 5: More initialization of the view
Now we want to call the showQuestionDetails() method when selecting a question in the table.
For this, you must add a listener to the selectionModel of questionsTable (see "Listening to the selection" slide of the course).
-
Do it in the
initialize()method we created earlier: add a listener to theselectionModelofquestionsTableand call theshowQuestionDetails()method with the selected question. If you prefer a less verbose implementation, we provide theQuizChangeListenerclass. -
Then the
initialize()method should reset the view.
Step 6: handling the save of an existing question
If you look in the controller, you notice that a handleSaveButton() is present.
This method is called when the Save button is clicked.
Its implementation is pretty straightforward because it gets the content of each field in order to fill the information stored inside currentQuestion.
Once it's done, it resets the view.
- Implement this method, then try to modify a question! It should be taken in consideration in the actual quiz.
Step 7: handling a new question
-
handleNewButton()is also required as you might have guessed. It should have the following behavior: -
It creates a new
Questionobject (a constructor is provided with default values) -
It add this question to the list of questions (use
QuestionService) -
It selects this new question in the list :
questionsTable.getSelectionModel().select(newQuestion);
Step 8: Handling a deletion
-
handleDeleteButton(), last but not least !
Marvelous gift, the implementation:
1 2 3 4 5 6 7 | |
Quiz with style
- To finish this practical work, make you quiz beautiful and play with CSS! Here is an example:
The CSS stylesheet quiz.css is already in your project and already wired to the view but is empty. Do not hesitate to add some style!
Highscores!
- If you have time, why don't you try to store the highscores in the java application and display them on the home page? The JDBC practical work can be of some use for that!